Cypress Component Testing
Getting started with Component Testing is super simple. Follow the guide below for a step by step guide on how to configure your project and quickly begin writing your first tests in just a few seconds.
Getting Started
Install Cypress
To begin we need to install Cypress in your project if you have not already done so.
npm install cypress --save-dev
Open Cypress
Once Cypress has been installed you can launch Cypress using the following command:
npx cypress open
You can also launch Cypress for a specific Testing Type using either --e2e or in this case the --component CLI Option.
Next, the Cypress Launchpad will guide you through configuring your project.
Configuring Component Testing
Select Testing Type
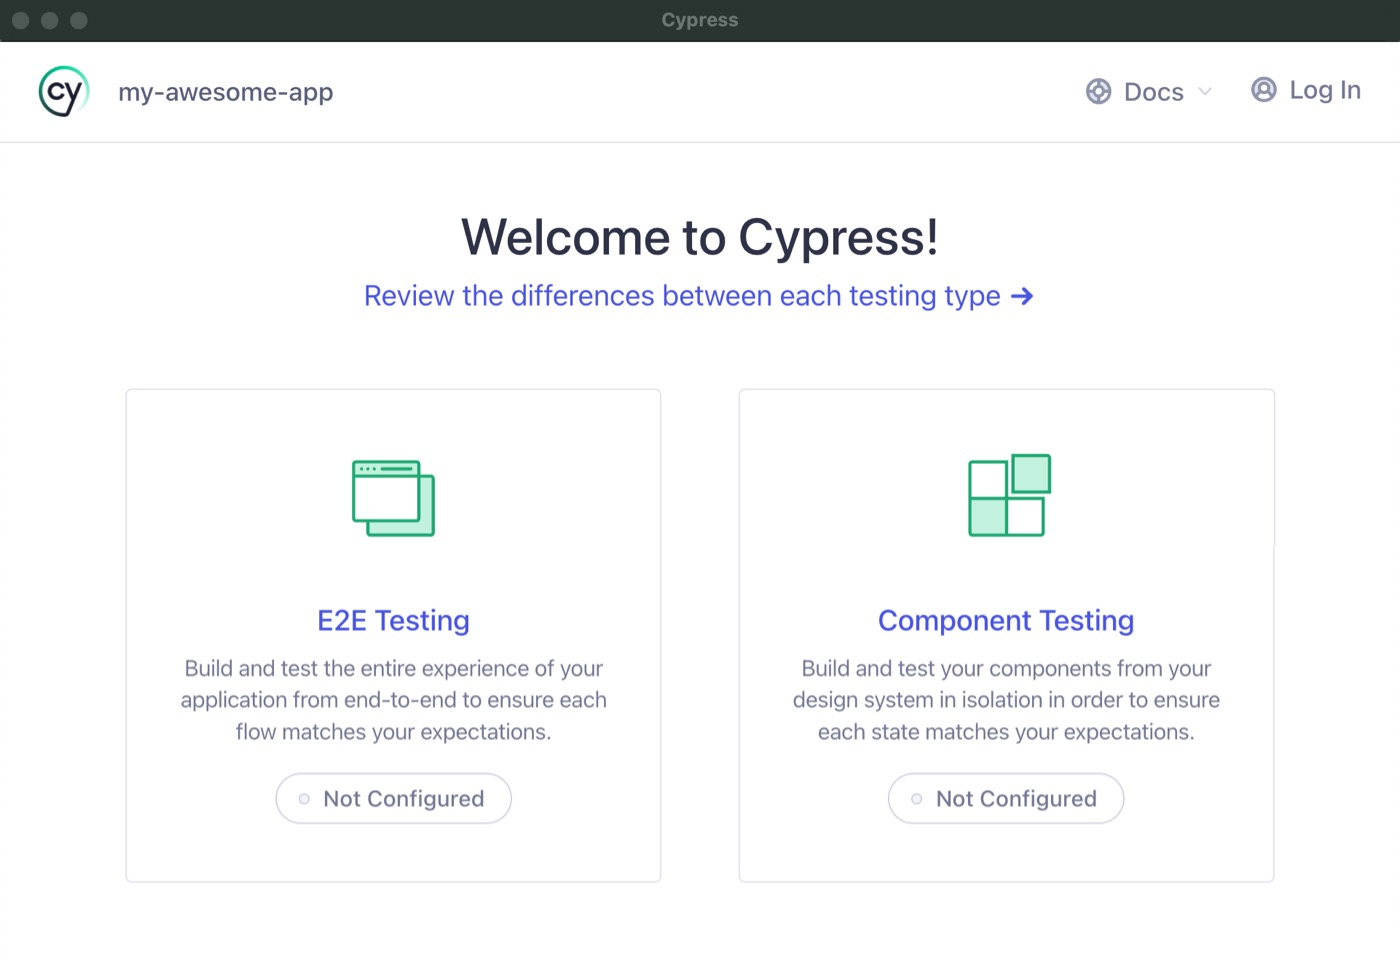
Whenever you run Cypress for the first time, the app will prompt you to set up either E2E Testing or Component Testing. Click on "Component Testing" to start the configuration wizard.
For more information on how to choose a testing type, we recommend this Testing Types Guide
Choose Component Testing
Project Setup
The Project Setup screen will automatically detect your framework and bundler. In this example we will use React and Vite. Click "Next Step" to continue.
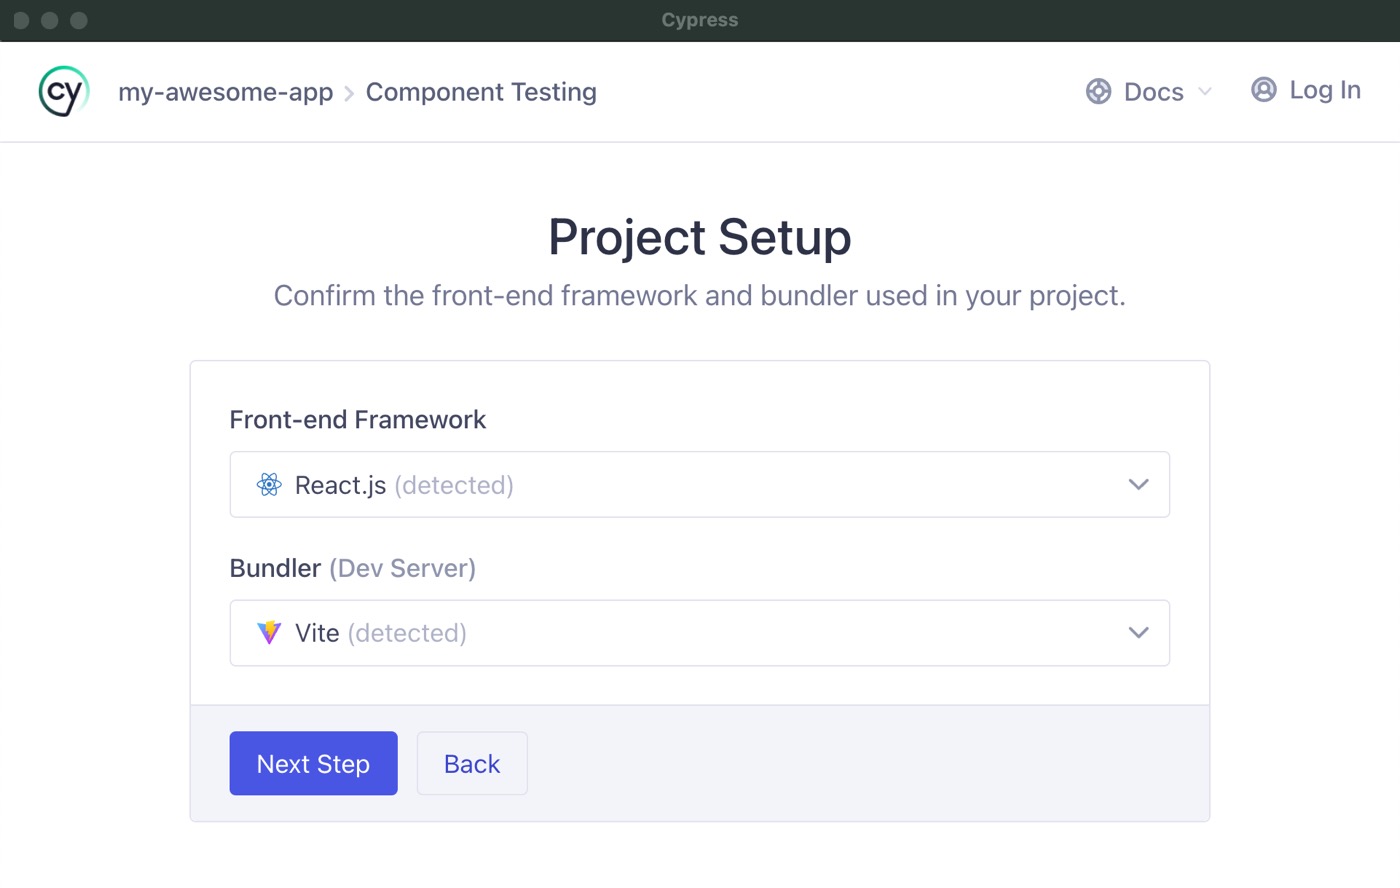
React and Vite are automatically detected
Installing Dependencies
The next screen checks that all the required dependencies are installed. All the items should have green checkboxes on them, indicating everything is good, so click "Continue".
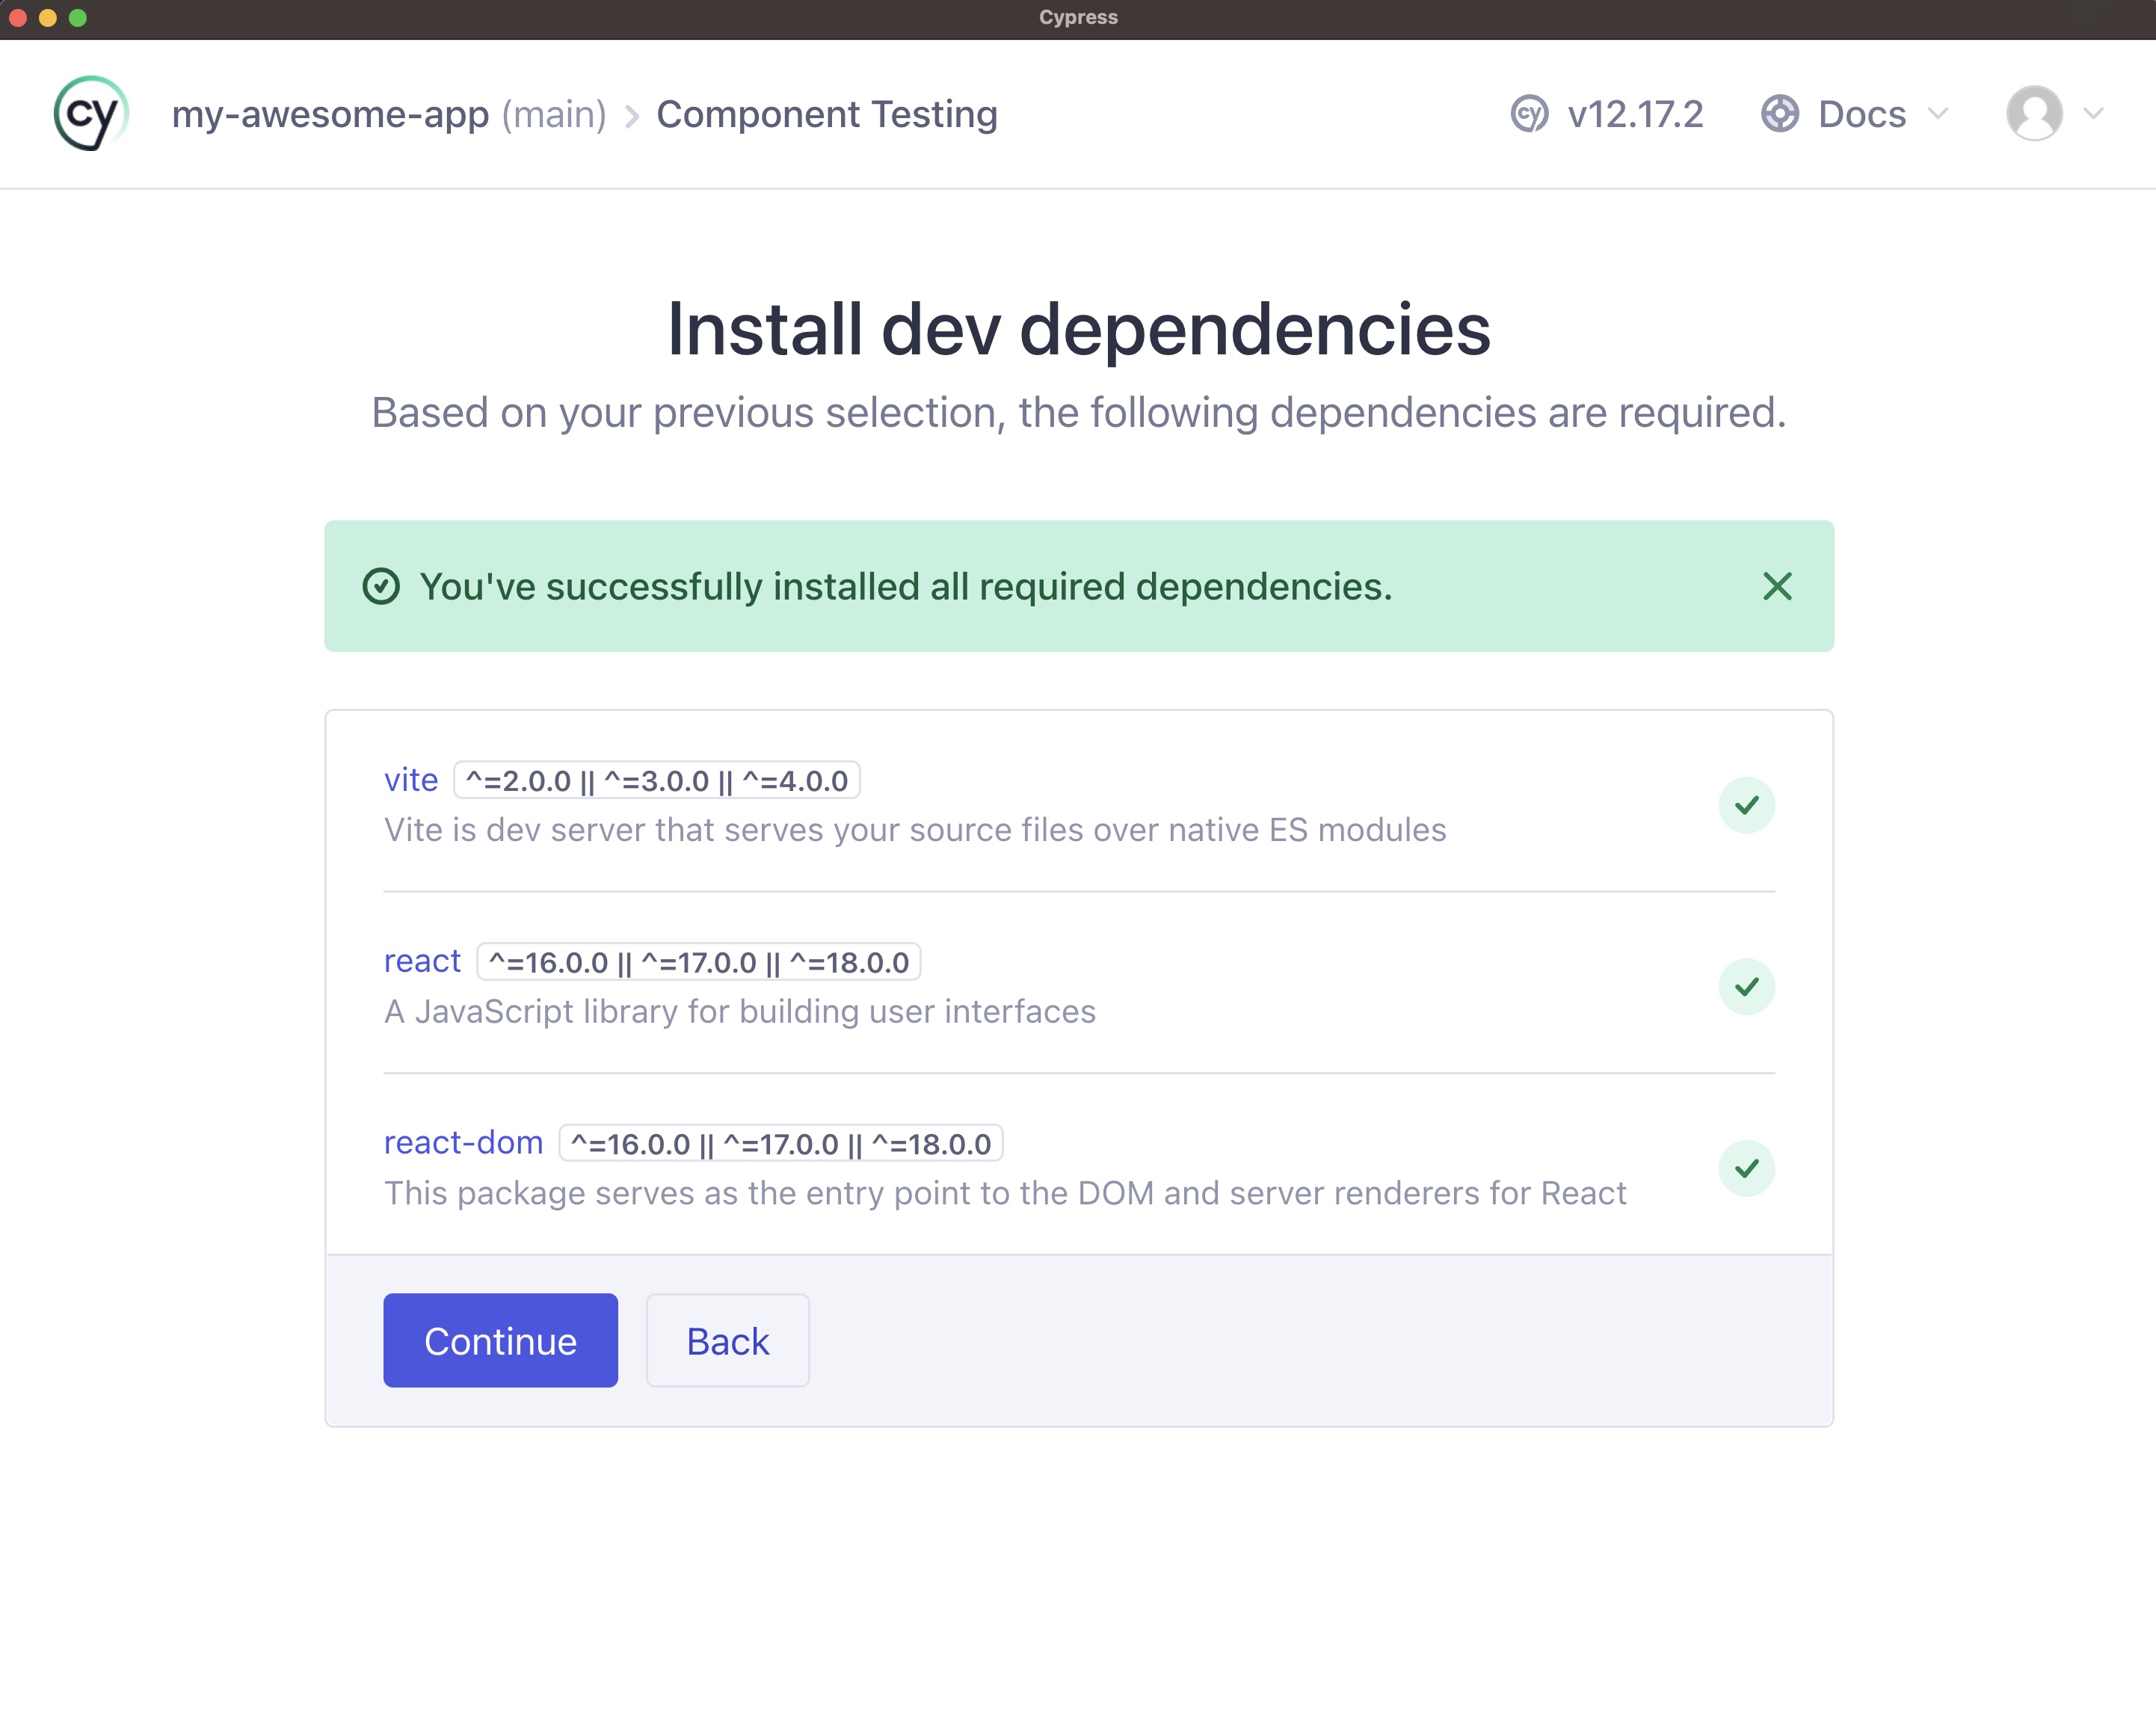
All necessary dependencies are installed
Config Files
Next, Cypress generates all the necessary configuration files and gives you a list of all the changes it made to your project. Click "Continue".
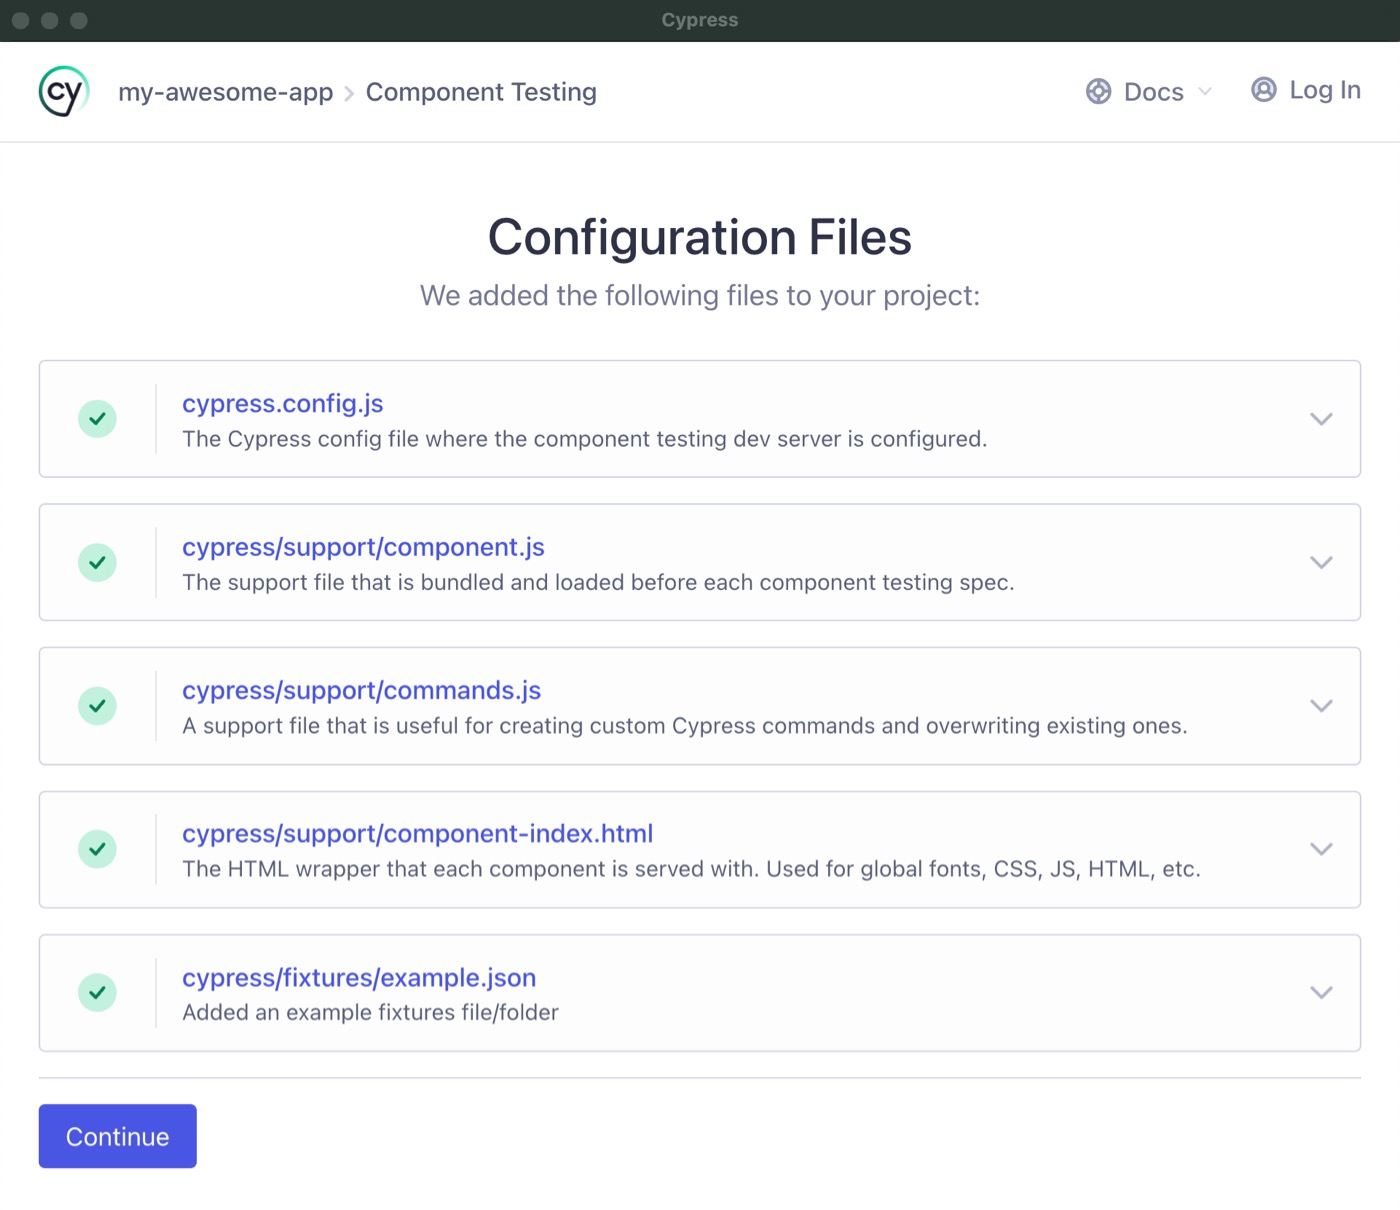
The Cypress launchpad will scaffold all of these files for you
Choose A Browser
After setting up component testing, you will be at the browser selection screen.
Pick the browser of your choice and click the "Start Component Testing" button to open the Cypress App.
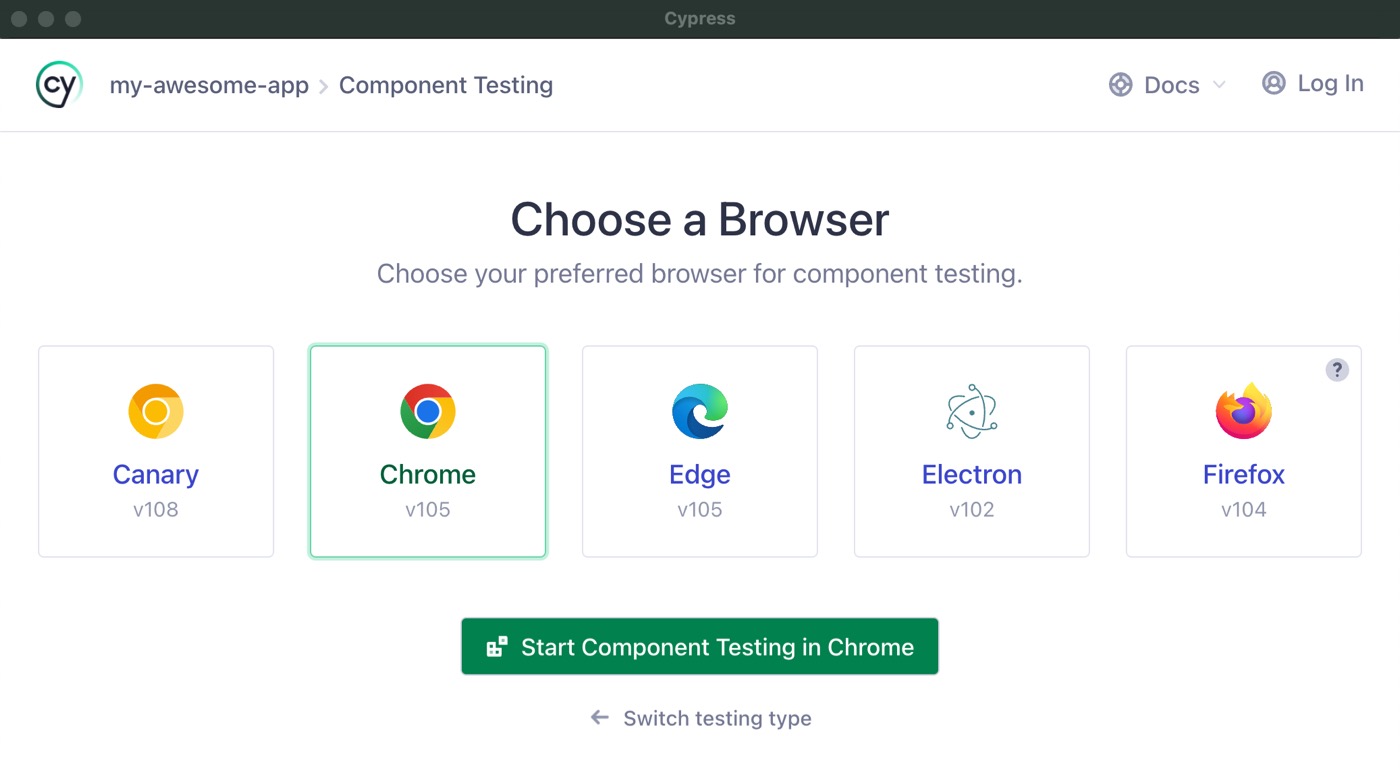
Choose your browser
Writing Your First Test
At this point, your project is configured to use Cypress Component Testing. However, when the test runner appears, it won't find any specs because we haven't created any yet. Now we need write our first Component Test.

Frameworks
Cypress currently has official mounting libraries for React, Angular, Vue, and Svelte. In addition to our official framework support there are many community plugins such as Qwik and Lit.
Your First Component Test
Though every framework is different and has its own unique nuances, in general, writing tests is very similar.
Let's look at how a basic test is written for a StepperComponent.
Let's assume the Stepper Component consists of two buttons, one used to decrement the counter and one
to increment it as well as a span tag that sits in the middle of the buttons to show the
current value of the counter.
To see examples of the Stepper Component and its tests in each Framework, visit our Component Testing Quick Start Apps Repo
- React
- Angular
- Vue
- Svelte
import React from 'react'
import Stepper from './Stepper'

describe('<Stepper />', () => {
  it('mounts', () => {
    // see: https://on.cypress.io/mounting-react
    cy.mount(<Stepper />)
  })
})
import { StepperComponent } from './stepper.component'

describe('StepperComponent', () => {
  it('mounts', () => {
    // see: https://on.cypress.io/mounting-angular
    cy.mount(StepperComponent)
  })
})
import Stepper from './Stepper.vue'

describe('<Stepper />', () => {
  it('mounts', () => {
    // see: https://on.cypress.io/mounting-vue
    cy.mount(Stepper)
  })
})
import Stepper from './Stepper.svelte'

describe('Stepper', () => {
  it('mounts', () => {
    // see: https://on.cypress.io/mounting-svelte
    cy.mount(Stepper)
  })
})
Test Explanation
Let's break down the spec. First, we import the Stepper component. Then, we
organize our tests using the functions describe and it, which allows us to
group tests into sections by using method blocks. These are global functions
provided by Cypress, which means you don't have to import them directly to use
them. The top-level describe block will be the container for all our tests in
a file, and each it represents an individual test. The describe function
takes two parameters, the first of which is the name of the test suite, and the
second is a function that will execute the tests.
We defined a test using the it function inside describe. The first parameter
to it is a brief description of the spec, and the second parameter is a
function that contains the test code. In our example above, we only have one
test, but soon we'll see how we can add multiple it blocks inside of a
describe for a series of tests.
The cy.mount() method will mount our component into the test app so we can begin running tests against it.
Now it's time to see the test in action.
Running the Test
Switch back to the browser you opened for testing, and you should now see the
Stepper Component in the spec list. Click it to see the spec execute.
Our first test verifies the component can mount in its default state without any errors. If there is a runtime error during test execution, the test will fail, and you will see a stack trace pointing to the source of the problem.
A basic test like the one above is an excellent way to start testing a component. Cypress renders your component in a real browser, and you can use all the techniques/tools you would normally during development, such as interacting with the component in the test runner, and using the browser dev tools to inspect and debug both your tests and the component's code.
Feel free to play around with the Stepper component by interacting with the
increment and decrement buttons.
Now that the component is mounted, our next step is to test that the behavior of the component is correct.
Selectors & Assertions
By default, the Stepper's counter is initialized to "0". We can override that value by specifying an initial count. Let's write a couple of tests that will verify both these states.
To do so, we will use a selector to access the span element that contains the
counter, and then assert that the text value of the element is what we expect it
to be.
There are various ways to select items from the DOM using Cypress. We will use cy.get(), which allows us to pass in a CSS-like selector.
After we "get" the element, we use the should assertion method to verify it has the correct text value.
Add the following test inside the describe block, right below the first test:
- React
- Angular
- Vue
- Svelte
it('stepper should default to 0', () => {
  cy.mount(<Stepper />)
  cy.get('span').should('have.text', '0')
})
it('stepper should default to 0', () => {
  cy.mount(StepperComponent)
  cy.get('span').should('have.text', '0')
})
it('stepper should default to 0', () => {
  cy.mount(Stepper)
  cy.get('span').should('have.text', '0')
})
it('stepper should default to 0', () => {
  cy.mount(Stepper)
  cy.get('span').should('have.text', '0')
})
When you go back to the test runner, you should see the test pass.
In the above test, we select the element by passing in "span" to cy.get(),
which will select all span tags in our component. We only have one span
currently, so this works. However, if our component evolves and we add another
span, then this test could start to fail. We should use a selector that will
be less brittle to future changes.
In the Stepper component, the span tag has a data-cy attribute on it:
- React
- Angular
- Vue
- Svelte
<span data-cy="counter">{count}</span>
<span data-cy="counter">{{ count }}</span>
<span data-cy="counter">{{ count }}</span>
<span data-cy="counter">{count}</span>
We assign a unique id to the data-cy attribute that we can use for testing
purposes. Update the test to use a CSS attribute selector to cy.get():
- React
- Angular
- Vue
- Svelte
it('stepper should default to 0', () => {
  cy.mount(<Stepper />)
  cy.get('[data-cy=counter]').should('have.text', '0')
})
it('stepper should default to 0', () => {
  cy.mount(StepperComponent)
  cy.get('[data-cy=counter]').should('have.text', '0')
})
it('stepper should default to 0', () => {
  cy.mount(Stepper)
  cy.get('[data-cy=counter]').should('have.text', '0')
})
it('stepper should default to 0', () => {
  cy.mount(Stepper)
  cy.get('[data-cy=counter]').should('have.text', '0')
})
The test will still pass as expected, and our selector is now future-proof. For more info on writing good selectors, see our guide Selector Best Practices.
Passing Props to Components
We should also have a test to ensure the count prop sets the count to
something else besides its default value of "0". We can pass in props to the
Stepper component like so:
- React
- Angular
- Vue
- Svelte
it('supports a "count" prop to set the value', () => {
  cy.mount(<Stepper count={100} />)
  cy.get('[data-cy=counter]').should('have.text', '100')
})
it('supports a "count" prop to set the value', () => {
  cy.mount(StepperComponent, {
    componentProperties: {
      count: 100,
    },
  })
  cy.get('[data-cy=counter]').should('have.text', '100')
})
it('supports a "count" prop to set the value', () => {
  cy.mount(Stepper, { props: { count: 100 } })
  cy.get('[data-cy=counter]').should('have.text', '100')
})
it('supports a "count" prop to set the value', () => {
  cy.mount(Stepper, { props: { count: 100 } })
  cy.get('[data-cy=counter]').should('have.text', '100')
})
Testing Interactions
We mounted and selected the element in the above tests but didn't interact with it. We should also test that the value of the counter changes when a user clicks the "increment" and "decrement" buttons.
To do so, we will interact with the component by using the click() command, which clicks a DOM element just like a real user would.
Add the following tests:
- React
- Angular
- Vue
- Svelte
it('when the increment button is pressed, the counter is incremented', () => {
  cy.mount(<Stepper />)
  cy.get('[data-cy=increment]').click()
  cy.get('[data-cy=counter]').should('have.text', '1')
})

it('when the decrement button is pressed, the counter is decremented', () => {
  cy.mount(<Stepper />)
  cy.get('[data-cy=decrement]').click()
  cy.get('[data-cy=counter]').should('have.text', '-1')
})
it('when the increment button is pressed, the counter is incremented', () => {
  cy.mount(StepperComponent)
  cy.get('[data-cy=increment]').click()
  cy.get('[data-cy=counter]').should('have.text', '1')
})

it('when the decrement button is pressed, the counter is decremented', () => {
  cy.mount(StepperComponent)
  cy.get('[data-cy=decrement]').click()
  cy.get('[data-cy=counter]').should('have.text', '-1')
})
it('when the increment button is pressed, the counter is incremented', () => {
  cy.mount(Stepper)
  cy.get('[data-cy=increment]').click()
  cy.get('[data-cy=counter]').should('have.text', '1')
})

it('when the decrement button is pressed, the counter is decremented', () => {
  cy.mount(Stepper)
  cy.get('[data-cy=decrement]').click()
  cy.get('[data-cy=counter]').should('have.text', '-1')
})
When you view the results of each of the tests, you will see that the counter is now "1" in the increment test, and "-1" in the decrement test. Not only did our tests pass, but we can visually see the results in a browser!
Testing Components with Events
All the state of the Stepper Component (ie: the count) is handled internally in the
component and then consumers are then alerted to changes to the state.
As the developer of the Stepper Component, you want to make sure when the
end-user clicks the increment and decrement buttons, that the appropriate event is
triggered with the proper values in the consuming component.
Using Spies
We can use Cypress Spies to validate these events are being called correctly. A spy is a special function that keeps track of how many times it was called and any parameters that it was called with. We can then assign a spy to our event, interact with the component, and then query the spy to validate it was called with the parameters we expect.
Let's set up the spies and bind them to the component:
- React
- Angular
- Vue
- Svelte
it('clicking + fires a change event with the incremented value', () => {
  const onChangeSpy = cy.spy().as('onChangeSpy')
  cy.mount(<Stepper onChange={onChangeSpy} />)
  cy.get('[data-cy=increment]').click()
  cy.get('@onChangeSpy').should('have.been.calledWith', 1)
})
it('clicking + fires a change event with the incremented value', () => {
  const onChangeSpy = cy.spy().as('onChangeSpy')
  cy.mount(StepperComponent, {
    componentProperties: {
      change: {
        emit: onChangeSpy,
      } as any,
    },
  })
  cy.get('[data-cy=increment]').click()
  cy.get('@changeSpy').should('have.been.calledWith', 1)
})
it('clicking + fires a change event with the incremented value', () => {
  const onChangeSpy = cy.spy().as('onChangeSpy')
  cy.mount(Stepper, { props: { onChange: onChangeSpy } })
  cy.get('[data-cy=increment]').click()
  cy.get('@onChangeSpy').should('have.been.calledWith', 1)
})
it('clicking + fires a change event with the incremented value', () => {
  const changeSpy = cy.spy().as('changeSpy')
  cy.mount(Stepper).then(({ component }) => {
    component.$on('change', changeSpy)
  })
  cy.get('[data-cy=increment]').click()
  cy.get('@changeSpy').should('have.been.calledWithMatch', {
    detail: { count: 1 },
  })
})
First, we create a new spy by calling the cy.spy() method. We pass in a string
that gives the spy an alias,
which assigns the spy a name by which we can reference it later. In
cy.mount(), we initialize the component and pass the spy into it. After that,
we click the increment button.
The next line is a bit different. We've seen how we can use the cy.get()
method to select elements, but we can also use it to grab any aliases we've set
up previously. We use cy.get() to grab the alias to the spy (by prepending an
"@" to the alias name). We assert that the method was called with the expected
value.
With that, the Stepper component is well tested. Nice job!
What's Next?
Congratulations, you covered the basics for Component Testing with Cypress!
To learn more about testing with Cypress, check out the Introduction to Cypress guide.