Enterprise SSO
Premium Cypress Cloud Feature
Enterprise SSO is included in our Business and Enterprise paid pricing plans.
All instructions below must be done by an Owner of the organization. If you are not an Owner of the Organization, coordinate with an Owner of the Organization to set up SSO.
Enable SSO
- Log in to Cypress Cloud and navigate to the Integrations page for your organization.
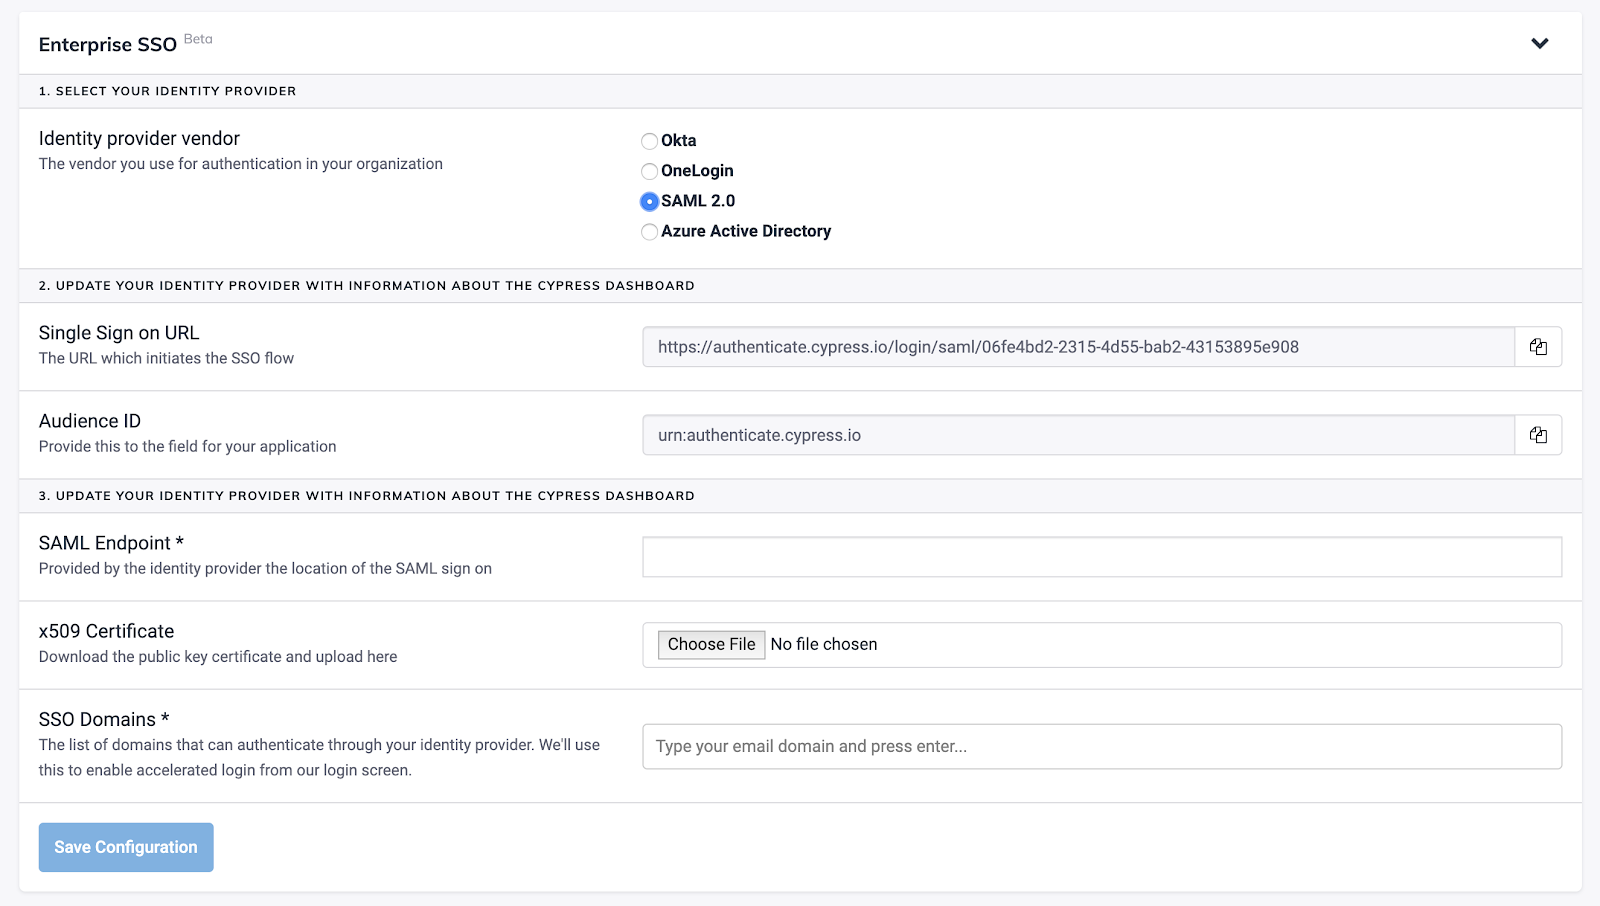
- Scroll down to the Enterprise SSO section. Select your SSO provider and take note of the information provided and required. Keep this window open and continue to the configuration instructions for your specific SSO provider below.
SSO Provider Configuration
Follow the instructions below for your specific SSO provider.
For Smart Card implementation, please reach out to Support for assistance.
Okta
Cypress Cloud can integrate with Okta via SAML. In addition to the documentation below, refer to Okta's official documentation for setting up a new SAML application.
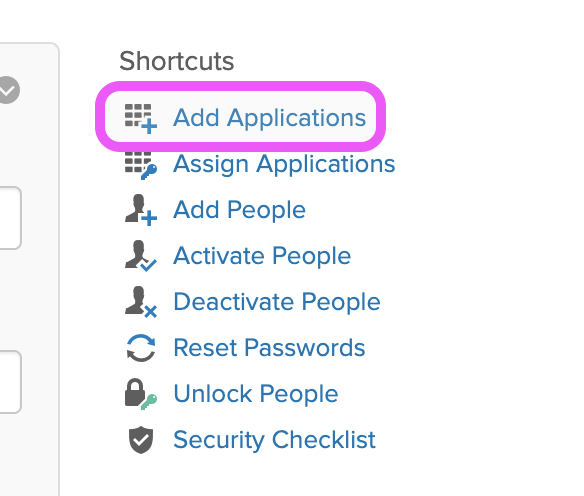
- Log into your Okta dashboard and head to the Admin section.

- Create a new SAML-based Web application.
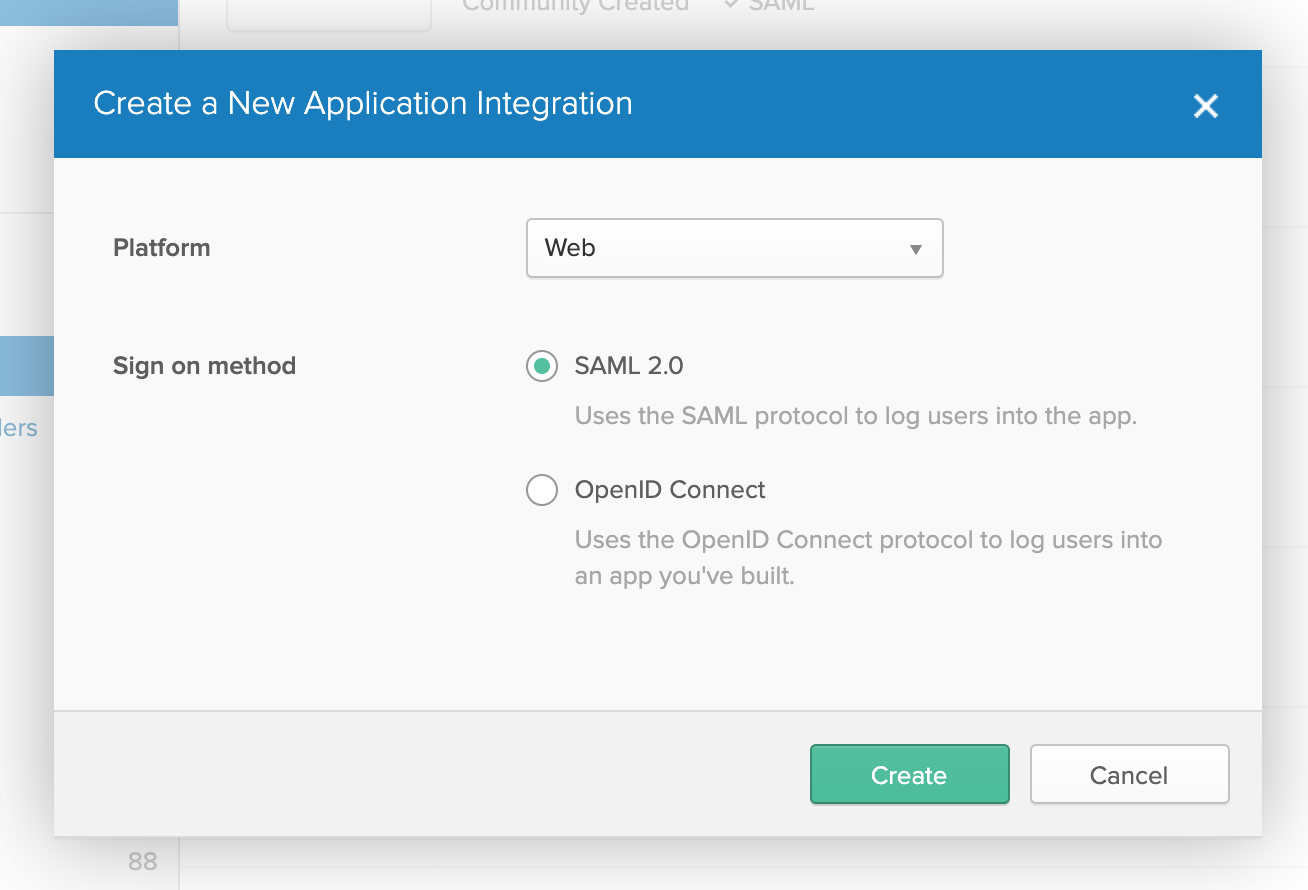
- Supply the following information requested in the Okta setup wizard:
- App name:
Cypress Cloud - App logo: Cypress logo download
- Single sign on URL: The URL provided in Cypress Cloud
- Audience URI: The URI provided in Cypress Cloud
- Attribute statements: Add the attribute statements described in Cypress Cloud
- Click Next then select I'm an Okta customer and click Finish.
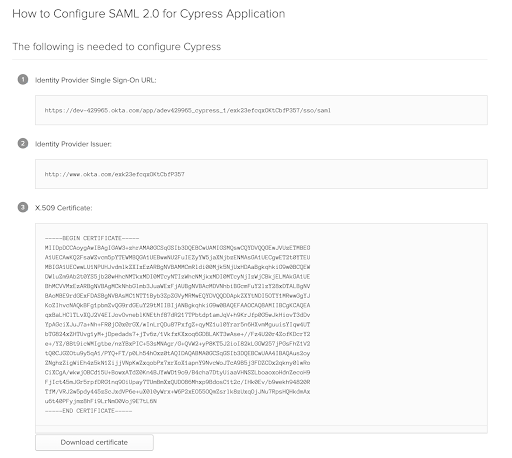
- Click the View Setup Instructions button in the middle of the page. Cypress Cloud needs the information provided here:
- Copy the Identity Provider Single sign-on URL to Cypress Cloud.
- Download the certificate and upload that to Cypress Cloud.
- Navigate to the Assignments tab and grant your users access to Cypress Cloud.
- Save Configuration.
SAML
Cypress Cloud can integrate with your identity provider via SAML. In addition to the documentation below, refer to your provider's official documentation for configuring a SAML integration.
- Log into the admin interface for your identity provider.
- Work through the setup wizard supplying the information requested:
- App name:
Cypress Cloud - App logo: Cypress logo download
- Single sign on URL: Collect the URL provided by Cypress Cloud
- Audience URI: Collect the URI provided by Cypress Cloud
- Add a custom mapping of AttributeStatements with the following:
User.Email: User's emailUser.FirstName: User's first nameUser.LastName: User's last name
- Collect the sign-on URL and certificate from your identity provider. Supply that to Cypress Cloud.
- Save Configuration.
Azure AD
Cypress Cloud can integrate with your identity provider via Azure AD. In addition to the documentation below, refer to the Microsoft Guides for configuring an application.
- Log into the Azure portal and create a new Application.
- Work through the application setup, supplying the following information when requested:
- App name:
Cypress Cloud - App logo: Cypress logo download
- Login URL: Collect the URL provided by Cypress Cloud
- Collect the
Client IDfor your application provided in the Application overview page. - Go to Certificates and Secrets in your Azure Application and create a new
secret that does not expire. Copy this newly-created secret and paste it in
the
Azure Client Secretfield in Cypress Cloud. - Under API Permissions in Azure AD, ensure the application has access to User.Read permissions
- Enter the domain used for your Active Directory, as well as the list of SSO domains you wish to allow user to authenticate with, in Cypress Cloud. This is used for SSO discovery from the login screen.
- Save Configuration.
Save Configuration
Return to Cypress Cloud and click Save Configuration. Cypress Cloud will attempt to authenticate.
🎉 Your integration is now complete! You can invite all of the users in your organization to sign in through your SSO provider.
Notes
- Once SSO is successfully set up, users will need to be invited via your SSO provider, as the Cypress Cloud invitation option will be disabled.
- All SSO Users are initially added with the User Role of Member. If a User needs different User Role permissions, this can be changed via Cypress Cloud by a current member with the role of Owner or Admin.
- SSO users are separate accounts from Google/GitHub or email/password users. If there are duplicate users, duplicates can be removed by any Owner or Admin.